
DIY Wedding Invitations
Everyone was shocked and delighted about our DIY wedding invites. Here is an instructional on how these invites came to life!
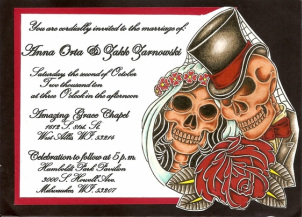
1. My friend Jason Stedman (a tattoo artist here in Milwaukee) drew the image for us. I gave him an idea of what I wanted and he used his artistic skills to give me the image of my dreams. If you know someone that draws ask them to help you out. If not, look locally for an artist.
2. Paper! For 150 invites I purchased two packages of regular stock paper, 2 packages of red paper, and 2 packages of white. Theresa, a friend of mine had a printing connection so we didn't have to pay for it. Otherwise Kinko's will print two on a page in color.
3. Cutting! I was lucky to have my little crew of amazing women help out! Jenny J, a paper and craft master, had the idea to cut each invite by hand and cut around the rose edge and around the man skulls hat to create a 3-D feel to it once it had the red paper behind it. Amy L, a paper craft master, help cut each printed image with a mini paper cutter. We were able to get two images on one piece of paper. Then we cut the red borders to put behind the printed image. Last Theresa cut all the black borders at work and gave me a perfect 4x6 invitation!!
4. Gluing!! We used thin double sided sticky tape that adheres to paper and glue sticks to put them together. (This also applied to our RSVP cards too)
5. More printing!! I used up all my resource points after the cutting/gluing so I was on my own when I decided to print each of the 150 guests name in a monotype corsiva font on each envelope. Very time consuming but well worth it! I pretty much copy and pasted everyone's address in the envelope template. Once I finished that I asked the fiance at the time to begin stuffing the envelopes. (remember, you will have to do S.A.S.E. too) And RSVP cards as well.
6. Details, details! I splurged on zazzle.com and got matching stamps too. They had a wonderful deal at about 40% of the regular price that day so I lucked out. They do that sale frequently. ( Again, I used then on the 4x6 envelopes and order smaller ones if you are doing 3.5x5" rsvp's. I ordered larger ones so had to go with them even on the smaller envelopes.woops. All in all. I loved them!!)
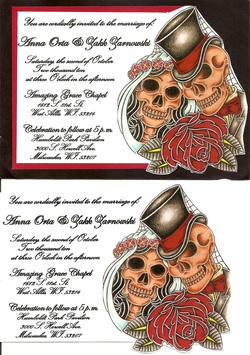
Bottom is uncut. Top image is cut around rose and male skull, bordered with red, then a 4x6 black backing.

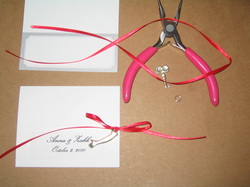
Rsvp cards, simply printed and glued on black stock to equal 3x5. Font on envelope printed individually on personal computer. Stamps from Zazzle.com to match invites.

RSVP image by Jason Stedman
DIY Wedding favors
Supplies needed
You will need:
Milagros (charms), depending on number of guests
jewelry pliers
jewelry jump rings, depending on guests
thin ribbon, your choice of color.
Smallest hole puncher
plain place cards.
Clear labels and printer
Patience:)
Simply put two holes next to each-other on the bottom right side of the place card. Get one jump ring and put it gently in between the holes. Add a charm and close securely using the pliers. Add a 6" piece of ribbon and make a bow. Last print your names and date of marriage on the clear labels. We added a poem on the inside also using the clear paper. People can use the charms for there own jewelry too:) Total cost for 150 people 80$
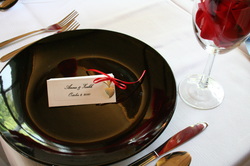
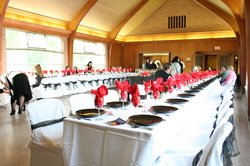
The finished look!
My favorite picture by : Nicole Acosta photography, click on picture to check out her website

Beautiful hubby:) Picture by Nicole Acosta Photography. Click on the picture to go to her site.
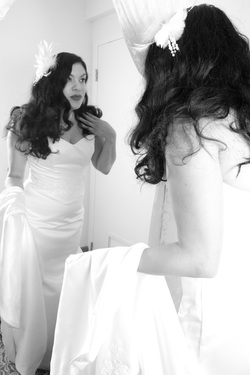
Before the reception
Reception Dress by Blue Velvet Vintage

Wedding photos by http://www.nicoleacostaphotography.com/
Blue Velvet Vintage has GORGEOUS vintage inspired dresses at really reasonable prices! Check them out by clicking on the link pic.
